Monday, February 28, 2011

Made with Love

If you've been following my blog for a while, you may remember the tote bag I made last year, and the altered journal I made to go with it. I truly enjoyed making them. So, when I learned of a birthday celebration for a young journalist friend, I decided that a journal would be a perfect gift for a journalist -- and a tote to carry it in would be a nice complement to it.

Because this young lady is also an awesome photographer, I decided I wanted to incorporate some of her photos into the project. Facebook provided all that I needed, and with a little conspiratory help from her sister about colours and quotations, I set about creating these:


I started with the bag (making it the same way I did my original tote), the back of which looks like this -- made from the vinyl of the seat of a chair that was beyond repair:


I thought it was a little plain, so I added a binder ring with some ribbons. I couldn't decide which side it looked better on, though. The fun part is, the ribbons can be put anywhere on the handles, or completely removed. I confess I thought the idea was a bit of a stroke of genius, if I do say so myself ;)


I did learn, though, that vinyl can't be ironed! Oops! See those melted bits????:


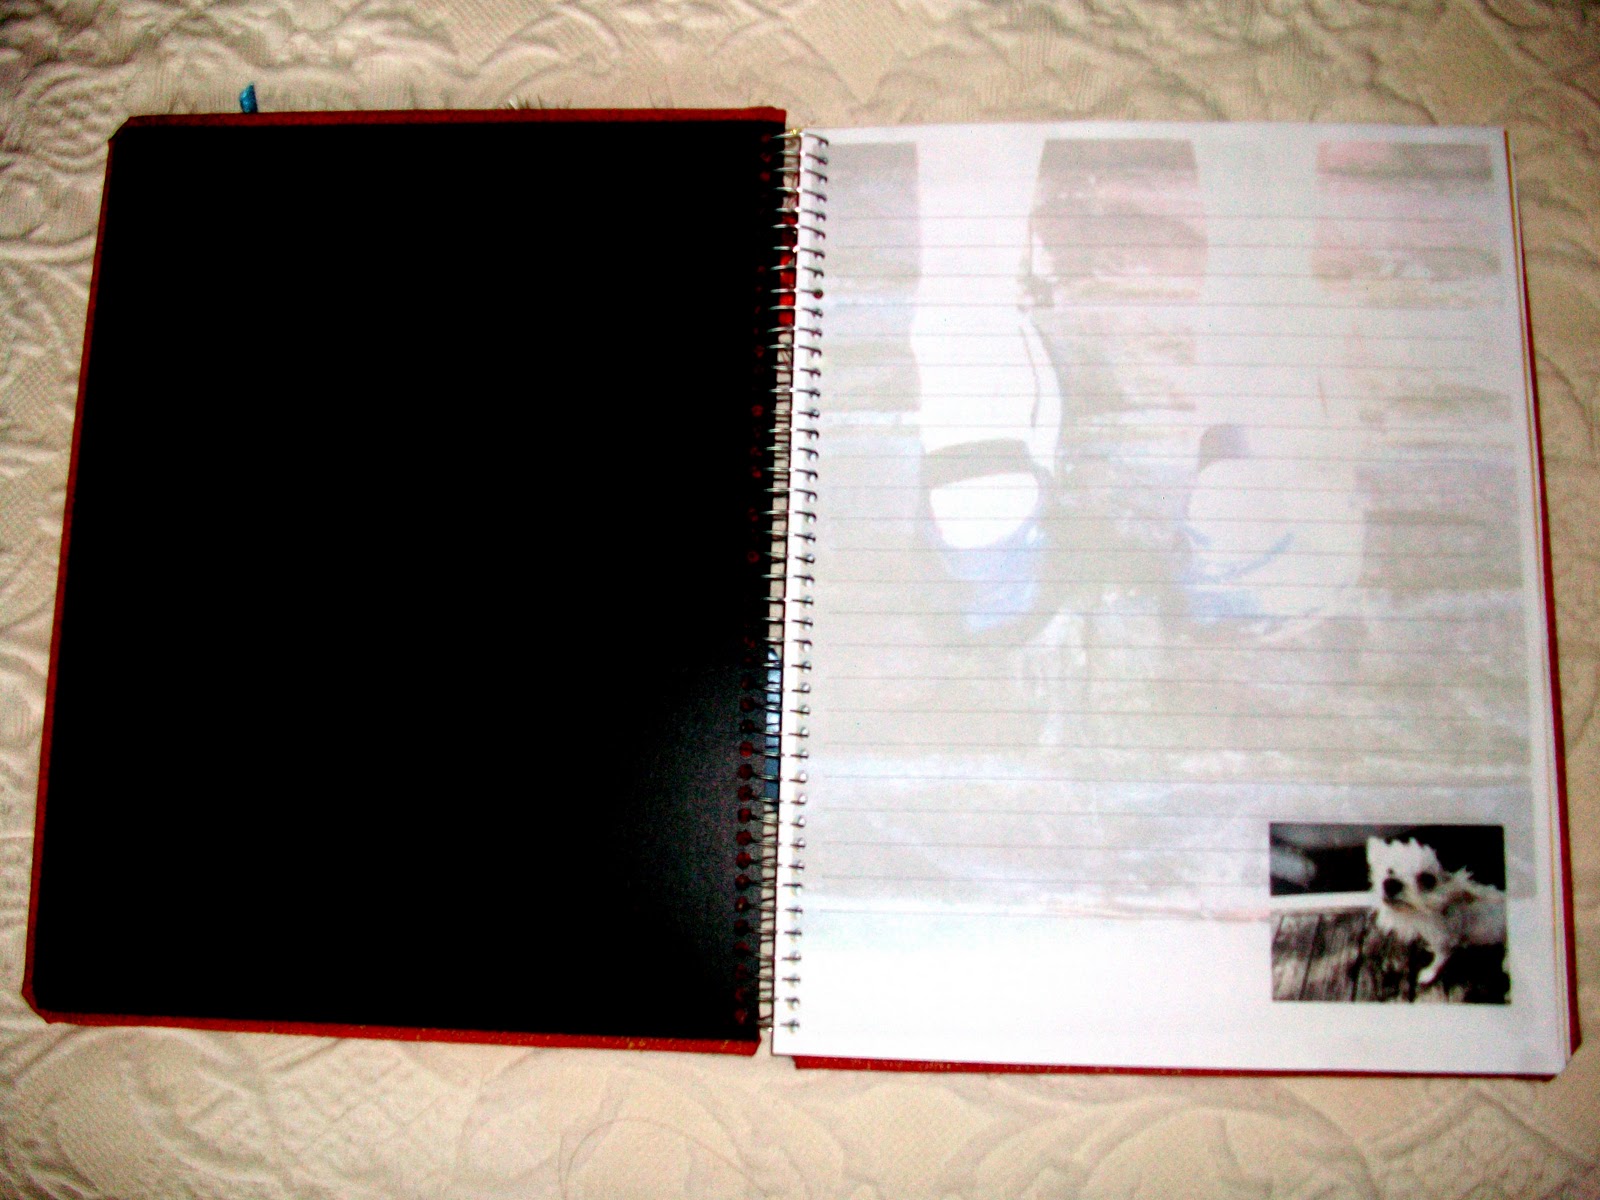
For the journal, I created a watermark with one of the young lady's photos and added lines for her to write on. Then I inserted more of her photos on a number of random pages. Is that not a great, quirky picture of her dog, Little Pete? ;) DH printed the pages for me, and I had them hole punched at a UPS Store.

 I also inserted a number of papers with different designs and textures, including card stock, vellum, and shimmery gold paper.


The hardest part was binding the covers. Because I had used the insides of an old binder and covered them with fabric, NO ONE was able to bind the whole thing for me. I really wanted it to be spiral bound with wire so that it could be folded back on itself. So, I was determined to find a way to do it myself. I started by drilling holes with DH's power drill using one of the pages as a guide for the holes. That worked, but the holes were too small -- I couldn't bind everything together. So I re-punched the holes using my Cropodile:


The challenge was then to keep all the holes lined up while I fed wire through them. I wound my length of wire around a broom handle so it was nicely coiled first -- and I used shishkabob skewers to keep my holes lined up. The wooden spoon handle helped to keep my wire rounded as I moved the skewers along and fed the wire through the holes: 


The results were not perfect, but I liked it better than any Cerlox binding, which seemed to be the only other option -- and that without my handmade covers, too:


So here is the front cover again:


And here is the back cover. You may or may not have noticed that the background fabric matches the lining fabric of the tote bag:


I don't especially like how messy the inside of the cover looks, but I was afraid to mess with trying to glue the plastic covers I'd got (just in case the hard covers didn't work out) to the inside of the covers:


 I guess I was on a creative roll because when I was cleaning up from the project, I found this piece of fabric with a jewel in it that I'd done to try out the GemMatic gizmo I'd recently received as a gift. I decided not to waste it -- and turned it into a matching book mark: 


A little package of mini gel pens thrown in -- and the gift was complete: )


I don't usually enjoy making more than one of anything -- but I'm tempted to make myself a bigger tote and maybe my own journal once my other one is full!

Are there any creative projects you've tried that you've enjoyed enough to make multiples?

I've linked this post to:


Friday, February 25, 2011

Math Rider - Product Review


Over the last several weeks, our family has had the opportunity to use and review Math Rider, an artificially intelligent software that develops children's mastery of foundational math skills: addition, subtraction, multiplication, and division. I received no financial compensation -- just free use of the program in return for an honest review.

System Requirements:
MathRider uses the Adobe® AIR™ runtime, which means it runs on Windows, Mac, and Linux platforms. It requires about 80MB of available hard disk space on your computer. Photobucket

Available as an immediate download to your computer, the program is on sale for $37 (regularly $49.95) -- less than the average cost of a single hour of private tutoring -- and lots more fun. Plus, it comes with a 30-day, money-back guarantee should you decide it is not a suitable program for your child(ren). It is easy to install and set up multiple players, who have their own accounts with optional passwords, and it is not limited to a subscription time period. (The downfall of it being a download instead of a web-based game is that you are limited to using it on the computer on which it is downloaded -- BUT you receive a "key" that allows you to download the game up to three times, so you could have it running on three different computers.)  Another bonus is that customers receive free, lifetime updates of the software, including when new features are added.
 
The premise of the game is that the player rides a horse named Shadow on several quests,  all of which are accomplished by jumping poles where math questions are posted. (Players choose their operation and level for each quest, with three levels of difficulty available. Parents may wish to supervise the selections to ensure children are not just sticking with the easy stuff -- not that any of my children would do that ;). As the rider approaches each pole, they must answer a question by typing their response and pressing enter on the keyboard. The player gets immediate feedback about their progress as each quest is broken down into sections, and an animated map displays how far they've travelled towards their destination during each leg of the journey.

Photobucket

As well, while they're playing, they can see how much time has elapsed while performing their tasks, how many poles (questions) they've cleared, how many poles they've missed, how many poles remain, and the number of points accumulated. A colour-coded statistics chart is also available to display where mastery has been achieved, and where the player needs to work.

Photobucket

Because the program can interpret student results, it can cater the questions according to the child's weak areas while still providing enough opportunities for success that the child is motivated to continue. For example, if a student repeatedly misses 4+4 = 8, they will have multiple opportunities to answer this question with an auditory cue that assists them with the answer. Therefore, they do not get frustrated because they simply don't know an answer and don't have time to "figure it out" during the game play.

If you need more details about the software, this video gives a great overview of the program: Math Rider
** Note: The program has a "rescue the princess" type theme and does include a wizard character.

Having given you a general sense of how the program works, let me tell you how we've used it, and our reactions to it. DS12, who loves all games that involve a screen, has been using it most days as a 10-minute warm-up for math. Initiallly, he was quite enthused, though he was less-than-impressed by the somewhat "childish" graphics in the narrative parts, and thought they could have been more original with the name "Mathlands". He was easily able to score points in the default "easy" level of addition, and it boosted his confidence -- which is good, since quick recall of math facts is a tremendous challenge for him. There were times when he was frustrated because he was typing the correct answer but the computer wasn't acknowledging it, but I think it was just because he wasn't quick enough on the draw for those particular questions. The program paces itself according to the student, so I think he just stumbled a few times and found it easier to blame the computer than his fact recall. His interest waned when the program became a daily requirement, and yet he was always excited to see his quest line rapidly progress on the animated map. He seemed genuinely pleased with his achievements, and I think it has been an excellent way for him to practice his recall of basic math facts. I have noticed a definite improvement in his ability to swiftly recall them.

I was pretty sure DD8 would find the program challenging, as she struggles with math. She found her first run-through very stressful because the numbers came at her so fast, and she had little time to think. This was discouraging and frustrating for her, and I wondered how much she would really benefit from the program. But she was keen to try again the next day, and was very excited every time she got an answer right -- to the point that she was often distracted by her excitement! While the program was getting to know her, she worked really hard at trying to figure out the answers (instead of recalling them) and would sometimes resort to pressing random numbers knowing that eventually she'd hit the right one. However, once they "got to know each other", she began to notice that she was starting to remember the answers instead of having to figure them out. That excited her -- and me! Clearly, the program was delivering on its promise to help her develop mastery of basic math facts! She has continued to be excited about using the program as part of her regular school day.

The clincher, though, was when she got up early one Saturday morning and immediately asked, "Can I do Math Rider -- please?" Truly -- I'd say that's a sign of one very successful math program!

Click here if you'd like to read more TOS Crew reviews of Math Rider and other products.

Thursday, February 24, 2011

Family Day Art -- Second Annual

This past Monday, our country celebrated Family Day -- and for the second year in a row, we made memories by creating a collaborative piece of art. We did some simple print-making, and I am quite pleased with the results :)

I used this as a sample to demonstrate what we would be doing:


We each started with a flat piece of styrofoam (cut from grocery store meat trays) and a pen. I added the tape tabs so that the "printing plates" were easier to hold:


Having each selected a colour of acrylic paint, we set out designing our prints -- together this time. (Last year we worked in shifts, which kind of defeated the family togetherness part :{ ) Isn't it awesome how engaged everyone is?!?!?!


Once we were satisfied with our designs, we used a sponge roller to apply a coat of paint to the styrofoam and lay it on a piece of white card stock. Voila! Here is DS4's "monster":


DS12's space galaxy:


DD8's twin deers (she used a stencil):


DD13's  contemplation of life -- demonstrating excellent mirror-writing skills:


DH's symbolic representation of our children, whose nicknames are Moonbeam, Sunshine, Starlight, and Fireglow, and the cross, representing the Light of the world:


And my random flower (I also used a stencil):


DH picked up the perfect frame for our project (I'm so thankful I had the foresight to make sure everyone oriented their prints the same way!!!):


Pretty cool, eh????? Now it graces the kitchen wall along with last year's piece:


The whole project took just a few minutes to create (a good thing, since some people were just humouring dear ol' mom ;) -- but as I mentioned, I'm very pleased with the results!

Have you done any simple -- or not so simple -- projects together as a family? How did they turn out? Do you have any great ideas for our 3RD annual Family Day Art Project????? (I left this one to the last minute -- I'd like to be better prepared next year!)

Tuesday, February 22, 2011

More Redwall Fare

So I thought our Redwall feast on Friday would have satisfied DS12's craving to cook for a while, especially since it took so much work on his part. But again today he asked if he could make supper using the Redwall Cookbook.  Why would I say no????

On the menu this evening was "Brockhall Badger Carrot Cakes" (of which DS12 ate 3, vegetable hater that he is -- ha!):


And "Rosey's Jolly Raspberry Jelly Rock Cakes":


I'm really hoping this is a sign of good things to come! I could really enjoy having a chef in the house :)

Monday, February 21, 2011

Monday Musings on the Creator in Me

If I believe (and I DO) that we're all created to be creative, it behooves me to find ways to enable my children to recognize their gifts of creativity as well. Trouble is, DS12 doesn't see himself as particularly creative -- unless we're talkin' Lego. Even though he often looks speculatively at random pieces of refuse and exclaims, "Hey, Mom -- this could be used to make art," he views ME as the artist, not himself. That troubles me. So, I'm determined to find opportunities for him (and my whole family) to express themselves creatively.

Yesterday, I think we latched onto something. . . . In recent months, he discovered that there was a cookbook to accompany Brian Jacques' Redwall series.


He was determined to get that book, and finally succeeded this past week. Then he began begging me to let him make supper using recipes from the book. Well, hey -- it doesn't take much for me to hand over the oven mitts and let someone else make dinner! So, yesterday afternoon he set to work making "Turnip, 'Tater, and Beet Root Pie":


(The white corner is the section with goat cheese especially for his sister, who is allergic to cow cheese ;)


And then we made Redwall's "Honey-Baked Apples" stuffed with dried cranberries (we added cinnamon to the recipe):


Did I mention that said son has a strong aversion to vegetables and fruit????????? He devoured BOTH dishes exclaiming how good they were! He and his siblings had double portions of the vegetables! Go figure!

While things were cooking and DS12 was walking the dog, I decided we needed to take things a step farther and really get all Redwallish. I wanted him to know I was onboard with him and his little creative outburst, so I set the table to reflect the atmosphere of the abbey he'd grown to love. I found a brown table cloth (actually -- it was a curtain that DH picked up thinking it would make a good table cloth, clever fellow that he is!) which had a texture that reminded me of wood. It was covered in stains, but DS13 read my mind when, after commenting himself that the fabric looked like wood (!!!!!)  he said, "The stains just look like knots in the wood." Oh, how that made me smile!


Then I "shopped the house" and found an assortment of decorative pieces that I thought were fitting for a festive table set by hares and moles and badgers: a swatch of fabric with vegetables and flowers, wood and metal candlestick holders with earthy coloured candles, a wooden box filled with straw, a geranium slip left over from summer, and a branch of pussy willows picked last spring):


While we didn't have enough for the whole family, I thought these dishes that a friend had given me also suited the theme:


Oh -- a tuna soufflé to accompany the meal, and we had a grand, themed dinner!


I think DS12 really enjoyed making and eating his creations, so perhaps we've found a creative culinary gift! And everyone had fun imagining that we were real Red-Wallians ;)

But I'd like to find more ways to encourage creativity in those, like DS12, who are not necessarily "artistically" bent so that they can truly learn to see the Creator in themselves . . .

I posted last year about our Art Fair, which in my mind was a great success. However, I've since learned that the idea of a second annual event, for some (including DS12), has been met with groans instead of cheers. Apparently we need to tweak things a bit. I'm wondering if we need to broaden the horizons and make it a Creativity Fair instead of an Art Fair -- so children could explore any aspect of creativity that appeals to them -- architecture, cooking, sewing, building, interior design, writing, jewellery making -- anything creative. Do you think that might make a difference?

I'm keen to hear your ideas! How can we encourage creativity in those who really don't recognize that they, too, are created to be creative?

Related Posts Plugin for WordPress, Blogger...